WEEK ONE
Task 2: Five blind one minute drawings
Task 3: Two five minute sketches
Online Photoshop Tutorial:
WEEK TWO
Example of Design Elements on site
Lines Size and Scale Texture

Activity:


Online Tutorial Orthographic

FINAL COMBINED IMAGES:


Fusion Material tutorial work on initials:
Colour Balance Alignment
Proximity Size
Shape Contrast Repetition or pattern
Built Environment Word Examples
Tree canopy, Green space, Branding Hardscape, Edges in landscaping, Street
Furniture (bike stands)
Structural elements Street Furniture ( bike stand)
Pathway Threshold
Structural element, Safety Element, Lighting, Stair riser, Cantilever
Balustrade Building skin, Water container, Accessibility Access
Facade, Active Frontage Public space
Foyer Signage
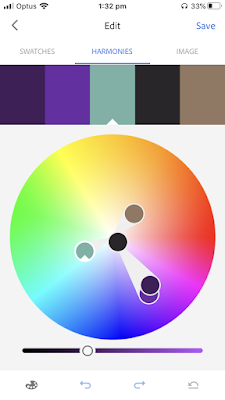
Adobe Capture:
Online Tutorial Infographic:
WEEK THREE:


Online Tutorial Orthographic
WEEK FOUR:

FINAL COMBINED IMAGES:


WEEK FIVE AND SIX:
2.5d model/ laser cutting template:
3D Paper and Cardboard Room Models:
1:20 Cardboard and paper model (could not find enough cardboard to make 1:10)


2.5d model/ laser cutting template:
3D Paper and Cardboard Room Models:
1:20 Cardboard and paper model (could not find enough cardboard to make 1:10)


1:10 PAPER ROOM MODEL FAIL
the paper was not rigid enough to maintain the rooms shape at this scale


1:50 Paper Model
Room model with Folding techniques:
A small loft was made to hold a bed with wardrobe space underneath and a ladder to reach the bed. This was made out of a mix of cardboard and paper and modelled around a 1:20 scale.


Draft room model:
Walk in wardrobe, loft, and bay window added onto a 1:20 scale model of the room
Walk in wardrobe, loft, and bay window added onto a 1:20 scale model of the room

WEEK SEVEN:
New room model with additional light source and scale of 1:20:
Two long rectangular windows were added along the top of the right and left walls of the room, and the window size was increased to produce a bay window.
Fusion Initials: C M H
2.5D Paper Model:
WEEK EIGHT:
Photoshopped Materials Model:

I chose to add white paneling and a grey stone tiled roofing as the materials for this model as they produce a hamptons, beach style to the room. I live by the beach and I spend most of my free time there. It is a place where I can relax and have fun so I really wanted to incorporate materials that represent that onto my model.
I chose a vertical wooden paneling along with a 'green' roof as I feel these materials fit best within the natural environment, and do not dominate it's surroundings. I have a passion for the environment and a strong interest in the concept of 'green' designs that are the future of the design industry. This is why I felt it was important for me to choose these materials.
Fusion Material tutorial work on initials:
Materials added:
- Blue leather
- Frosted glass
- Ruby glass
Improved room model:
Made of out cardboard and paper and based off of the week 7 room model. Glue was used to join pieces together opposed to masking tape for a neater model
WEEK NINE:
100 Word statement
For the BENV1010 course I have modelled my ideal bedroom. Learning various model making techniques over the past 5 weeks has allowed me to do this. To achieve a neat, unified model, an adhesive should be used to join the pieces of a model together. The significant differences between my final two models was the use of glue over masking tape. The yellow tinged masking tape contrasted with the white cardboard greatly, making it more predominate in the final images and partially taking the focus away from the design. The tape also dulls the sharpness of lines within a model resulting in less defined photographs. Therefore, using an adhesive opposed to tape produces a neater more unified model.
WEEK TEN:
Process Images


No comments:
Post a Comment